Why Grilled Chicken Fingers Are a Game-Changing Dish
Let me tell you a little story. One summer evening, my friends came over for a casual hangout. I wanted to whip up something quick, easy, and crowd-pleasing. That’s when I decided to make grilled chicken fingers. They turned out so juicy, flavorful, and finger-licking good that everyone kept asking for seconds. And guess what? Even the kids couldn’t get enough of them. Ever since that day, this recipe has become a staple in my home. Whether it’s a busy weekday dinner or a weekend cookout, these grilled chicken fingers never disappoint.
The Story Behind This Finger-Licking Favorite
Chicken tenders have been a beloved dish for decades. Traditionally, they were fried to golden perfection, but as people became more health-conscious, grilling emerged as a healthier alternative. The beauty of grilled chicken fingers lies in their simplicity. You can trace their origins back to Southern kitchens where chicken tenderloins were first served as a quick snack. Over time, chefs added their own twists—marinades, spices, and dipping sauces—to elevate the humble dish. I like to think of grilled chicken fingers as the modern-day upgrade: crispy on the outside, juicy on the inside, and guilt-free!
Why You’ll Fall Head Over Heels for This Recipe
Here’s the deal: grilled chicken fingers are ridiculously easy to make. You don’t need fancy equipment or hours of prep time. Just toss the ingredients together, grill, and serve. Plus, they’re versatile. You can pair them with your favorite dipping sauces, toss them in salads, or even stuff them into sandwiches. The flavors are bold yet simple, allowing the natural goodness of the chicken to shine through. Trust me, once you try this recipe, you’ll wonder why you didn’t make it sooner.
Perfect Occasions to Whip Up These Tasty Bites
These grilled chicken fingers are perfect for any occasion. Hosting a backyard BBQ? Check. Need a quick weeknight meal? Double check. Want to impress your kids with a fun dinner idea? Triple check. They’re also a hit at potlucks, game nights, and family gatherings. Honestly, there’s no wrong time to make them. Pro tip: Serve them with a variety of dips like honey mustard, ranch, or barbecue sauce to keep everyone happy.
What You’ll Need
- 1 pound chicken tenderloins
- 2 tablespoons olive oil
- 1 teaspoon garlic powder
- 1 teaspoon paprika
- 1 teaspoon salt
- ½ teaspoon black pepper
- 1 tablespoon lemon juice
- Your favorite dipping sauces

Substitution Options
- Swap olive oil for avocado oil if you prefer a richer flavor.
- Use lime juice instead of lemon juice for a tangy twist.
- Replace paprika with smoked paprika for a deeper, smoky taste.
- If you don’t have chicken tenderloins, you can cut boneless, skinless chicken breasts into strips.
Step 1: Marinate the Chicken
To start, place the chicken tenderloins in a bowl. Drizzle olive oil over them, then sprinkle garlic powder, paprika, salt, and pepper. Add a splash of lemon juice for brightness. Mix everything gently with your hands until the chicken is evenly coated. Let it sit for at least 15 minutes to soak up all those flavors. Pro tip: If you have time, marinate the chicken for an hour in the fridge—it makes a world of difference.
Step 2: Preheat the Grill
While the chicken marinates, preheat your grill to medium-high heat. Make sure the grates are clean and lightly oiled to prevent sticking. You want the grill hot enough to give the chicken that beautiful char but not so hot that it burns on the outside while staying raw inside. A temperature of about 400 degrees Fahrenheit works perfectly here. Fun fact: Cooking chicken tenders at 400 degrees ensures they cook evenly without drying out.
Step 3: Grill the Chicken
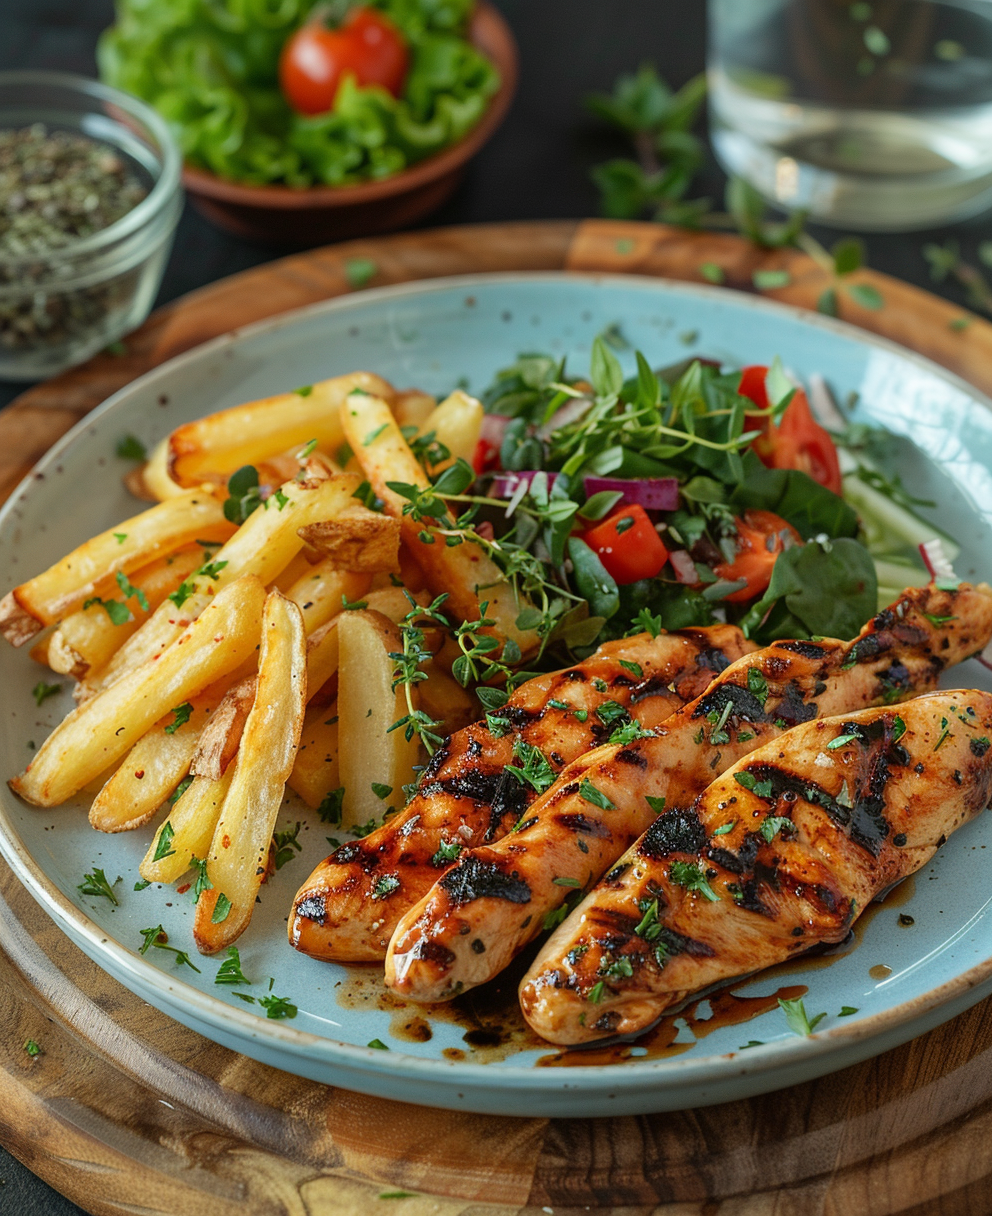
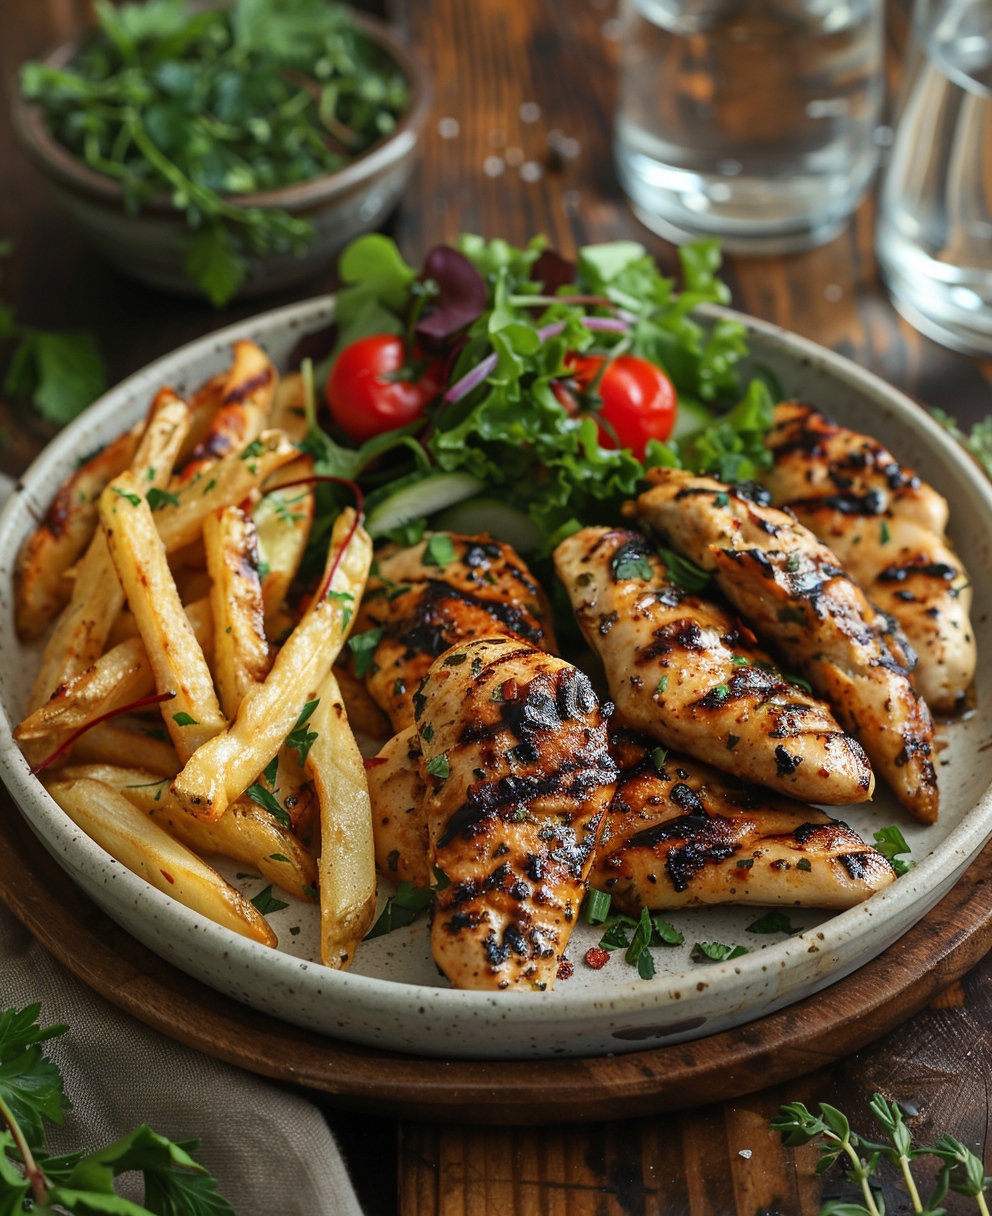
Place the chicken tenderloins on the grill and let them cook for about 3-4 minutes per side. Keep an eye on them—you’ll know they’re ready to flip when they release easily from the grates and have nice grill marks. How long should you grill chicken tenders? It depends on their thickness, but usually 6-8 minutes total does the trick. The secret to juicy tenders? Don’t overcrowd the grill; give each piece enough space to cook evenly.
Step 4: Rest and Serve
Once the chicken reaches an internal temperature of 165 degrees Fahrenheit, remove it from the grill and let it rest for a couple of minutes. This resting period locks in the juices, ensuring every bite is moist and flavorful. While the chicken rests, set out your dipping sauces. Arrange the grilled chicken fingers on a platter, garnish with fresh herbs if you like, and watch them disappear faster than you can say “yum.”
Chef’s Tip
For extra crispy edges, pat the chicken dry with paper towels before marinating. Removing excess moisture helps achieve that perfect sear on the grill. It’s a small step, but it makes a big difference.
Timing Breakdown
- Prep Time: 10 minutes
- Cooking Time: 10 minutes
- Resting Time: 2 minutes
- Total Time: 22 minutes
An Interesting Fact About Chicken Tenders
Did you know that chicken tenderloins are actually a specific part of the chicken breast? They’re the strip of meat found underneath the breast, near the wing joint. That’s why they’re naturally tender and perfect for recipes like grilled chicken fingers. By the way, what’s the difference between chicken tender strips and fingers? Not much—they’re often used interchangeably, though “fingers” usually refers to breaded versions, while “strips” are grilled or baked.
Necessary Equipment
- Grill (gas or charcoal)
- Tongs
- Bowl for marinating
- Meat thermometer
- Brush for oiling the grill
Storage Tips
Got leftovers? Lucky you! Store the grilled chicken fingers in an airtight container in the fridge for up to 3 days. Reheat them in the oven at 350 degrees Fahrenheit for about 10 minutes to retain their juiciness. Avoid microwaving, as it can make the chicken rubbery. For longer storage, freeze the cooked chicken in a freezer-safe bag for up to 3 months. Thaw overnight in the fridge before reheating.
If you’re meal prepping, portion out the chicken into individual servings. This makes it super convenient to grab-and-go during busy weekdays. Pro tip: Freeze the chicken flat on a baking sheet before transferring it to a bag. This prevents clumping and makes it easier to thaw later.
Finally, label your containers with the date so you always know how fresh they are. Proper storage ensures your grilled chicken fingers stay delicious even after a few days.
Tips and Advice
- Don’t skip the marinade—it’s key to infusing flavor.
- Always use a meat thermometer to avoid undercooking.
- Experiment with different seasonings to keep things exciting.
- Brush the grill with oil right before adding the chicken to prevent sticking.
- Serve with a variety of dipping sauces to cater to everyone’s tastes.
Presentation Ideas
- Serve the grilled chicken fingers on a wooden board with colorful veggie skewers for a rustic look.
- Arrange them in a basket lined with parchment paper for a picnic vibe.
- Garnish with fresh parsley or cilantro for a pop of color.
- Create a DIY dipping station with multiple sauces in small bowls.
Healthier Alternatives
If you’re looking to switch things up, here are six variations:
- Gluten-Free Grilled Chicken Fingers: Use gluten-free seasoning blends and serve with tamari-based dipping sauces.
- Low-Sodium Version: Skip the salt and use herbs like rosemary and thyme for flavor.
- Spicy Grilled Chicken Fingers: Add cayenne pepper or red chili flakes to the marinade for a kick.
- Lemon Herb Chicken Strips: Increase the lemon juice and add fresh dill or basil for a refreshing twist.
- Asian-Inspired Chicken Fingers: Marinate with soy sauce, ginger, and sesame oil before grilling.
- Keto-Friendly Chicken Tenders: Coat the chicken in almond flour and Parmesan before grilling for a low-carb crunch.
Mistake 1: Overcrowding the Grill
When you pile too many chicken pieces onto the grill, they steam instead of sear. This leads to soggy chicken instead of crispy, juicy grilled chicken fingers. To avoid this, cook in batches if needed. Give each piece enough room to breathe and develop those gorgeous grill marks.
Mistake 2: Skipping the Thermometer
Guessing whether the chicken is done is risky business. Undercooked chicken can harbor harmful bacteria, while overcooked chicken turns dry and chewy. Always use a meat thermometer to ensure the internal temperature hits 165 degrees Fahrenheit. It’s the safest way to nail perfectly cooked grilled chicken fingers.
Mistake 3: Using High Heat
Turning the grill up too high might seem like a shortcut, but it only burns the outside while leaving the inside raw. Stick to medium-high heat for consistent results. Patience pays off when it comes to grilling chicken tenders.
Frequently Asked Questions
How Long Should You Grill Chicken Tenders?
Typically, chicken tenders take about 6-8 minutes on the grill, flipping halfway through. Thicker pieces may need a bit more time, so always check the internal temperature to ensure they’re fully cooked.
What’s the Secret to Juicy Tenders?
The secret lies in marinating the chicken and avoiding overcooking. Letting the chicken rest after grilling also helps lock in moisture, resulting in juicy, flavorful grilled chicken fingers.
How Long Should Chicken Tenders Be Cooked at 400 Degrees?
At 400 degrees, chicken tenders usually take 8-10 minutes to cook through. Flip them halfway to ensure even cooking and browning.
What’s the Difference Between Chicken Tender Strips and Fingers?
Chicken tender strips and fingers are similar, but “fingers” often refer to breaded versions, while “strips” are typically grilled or baked. Both come from the tenderloin section of the chicken breast.
Can I Use Frozen Chicken?
Yes, but thaw it completely in the fridge before grilling. Frozen chicken won’t cook evenly and could pose a food safety risk.
Do I Need to Oil the Grill?
Absolutely. Oiling the grill prevents sticking and helps achieve those beautiful grill marks. Use a brush or paper towel dipped in oil to coat the grates.
Can I Bake Instead of Grill?
Yes, you can bake grilled chicken fingers at 400 degrees for 15-20 minutes. However, grilling gives them a unique smoky flavor that baking can’t replicate.
What Are Some Good Side Dishes?
Pair your grilled chicken fingers with roasted veggies, sweet potato fries, coleslaw, or a fresh green salad for a balanced meal.
Is This Recipe Kid-Friendly?
Absolutely! Kids love the mild flavor and fun finger-food format. Serve with kid-approved dips like ketchup or honey mustard.
Can I Make This Recipe Ahead?
Yes, you can prep the marinade and chicken a day in advance. Store them in the fridge until you’re ready to grill.
Wrap-Up
Grilled chicken fingers are a versatile, healthy, and downright delicious dish that everyone will enjoy. From their juicy texture to their endless pairing possibilities, they’re a winner every time. So fire up that grill, gather your ingredients, and treat yourself and your loved ones to a meal that’s as easy to make as it is satisfying to eat. Cheers to good food and great company!
src=”https://chickenrecipes.ozviral.com/wp-content/uploads/2025/09/grilled-chicken-fingers4-file.png” alt=”grilled chicken fingers”>
Grilled Chicken Fingers
Ingredients
Equipment
Method
- Place chicken tenderloins in a bowl and drizzle with olive oil.
- Sprinkle garlic powder, paprika, salt, and pepper over the chicken.
- Add lemon juice and mix everything gently until chicken is evenly coated.
- Let the chicken sit for at least 15 minutes to marinate (or up to an hour in the fridge for better flavor).
- Preheat your grill to medium-high heat (around 400°F).
- Place the marinated chicken tenderloins on the grill and cook for about 3-4 minutes per side.
- Ensure the chicken is cooked through, with an internal temperature of 165°F.
- Remove the chicken from the grill and let it rest for a couple of minutes before serving.